Give a try to this Earl grey cheesecake, if you’re looking for a more special dessert. This unique combination of earl grey tea flavor with a combination of cream cheese, biscuits, sugar, and evaporated milk makes a treat for your taste buds. Even if it looks and may sound fancy, it is very easy to make if you will follow all the steps.
If you are a fan of different cheesecakes, you should try this one if you’re looking for something more special and elegant.
The subtle yet distinct flavor of the Earl Grey tea adds a unique twist to the classic cheesecake recipe, making it a refreshing dessert that’s perfect for any time of the year.
This dessert is the perfect combination of creamy cheesecake and aromatic tea bags, making it a treat for your taste buds.
The crust is made with crumbly digestive biscuits mixed with butter, while the filling is made with cream cheese, powdered sugar, and a generous helping of steeped Earl Grey tea.
With a few simple steps, you can easily make this delicious and unique dessert that’s sure to impress your guests or satisfy your sweet tooth.
It is perfect for any occasion, whether it’s a family gathering or a special celebration.
So why not give it a try and impress your loved ones with your culinary skills?
🥰 Why You Will Love This Recipe?
- The combination of Earl Grey tea and creamy cheesecake is a match made in dessert heaven. You will get a unique and delicious flavor. The subtle notes of the tea perfectly complement the sweet and creamy cheesecake, creating a unique and delicious flavor that’s sure to impress.
- Despite its fancy-sounding name, this recipe is actually quite easy to make if you will follow all the steps. With just a few simple ingredients and some basic kitchen equipment, you can whip up this tasty dessert in no time.
- This recipe is highly customizable, so you can adjust the sweetness, the strength of the Earl Grey tea or even experiment with different types of tea to create your own unique version of this dessert.
- This Earl Grey Cheesecake is the perfect dessert for any occasion. Whether you’re hosting a dinner party or just want to indulge in a delicious treat, you should consider making this earl grey tea if you want something more memorable.
- This cheesecake not only tastes great, but it also looks impressive with its smooth and creamy texture and crumbly biscuit crust. It’s sure to wow your guests and make you look like a professional pastry chef.
🥘 Ingredients and Substitutes
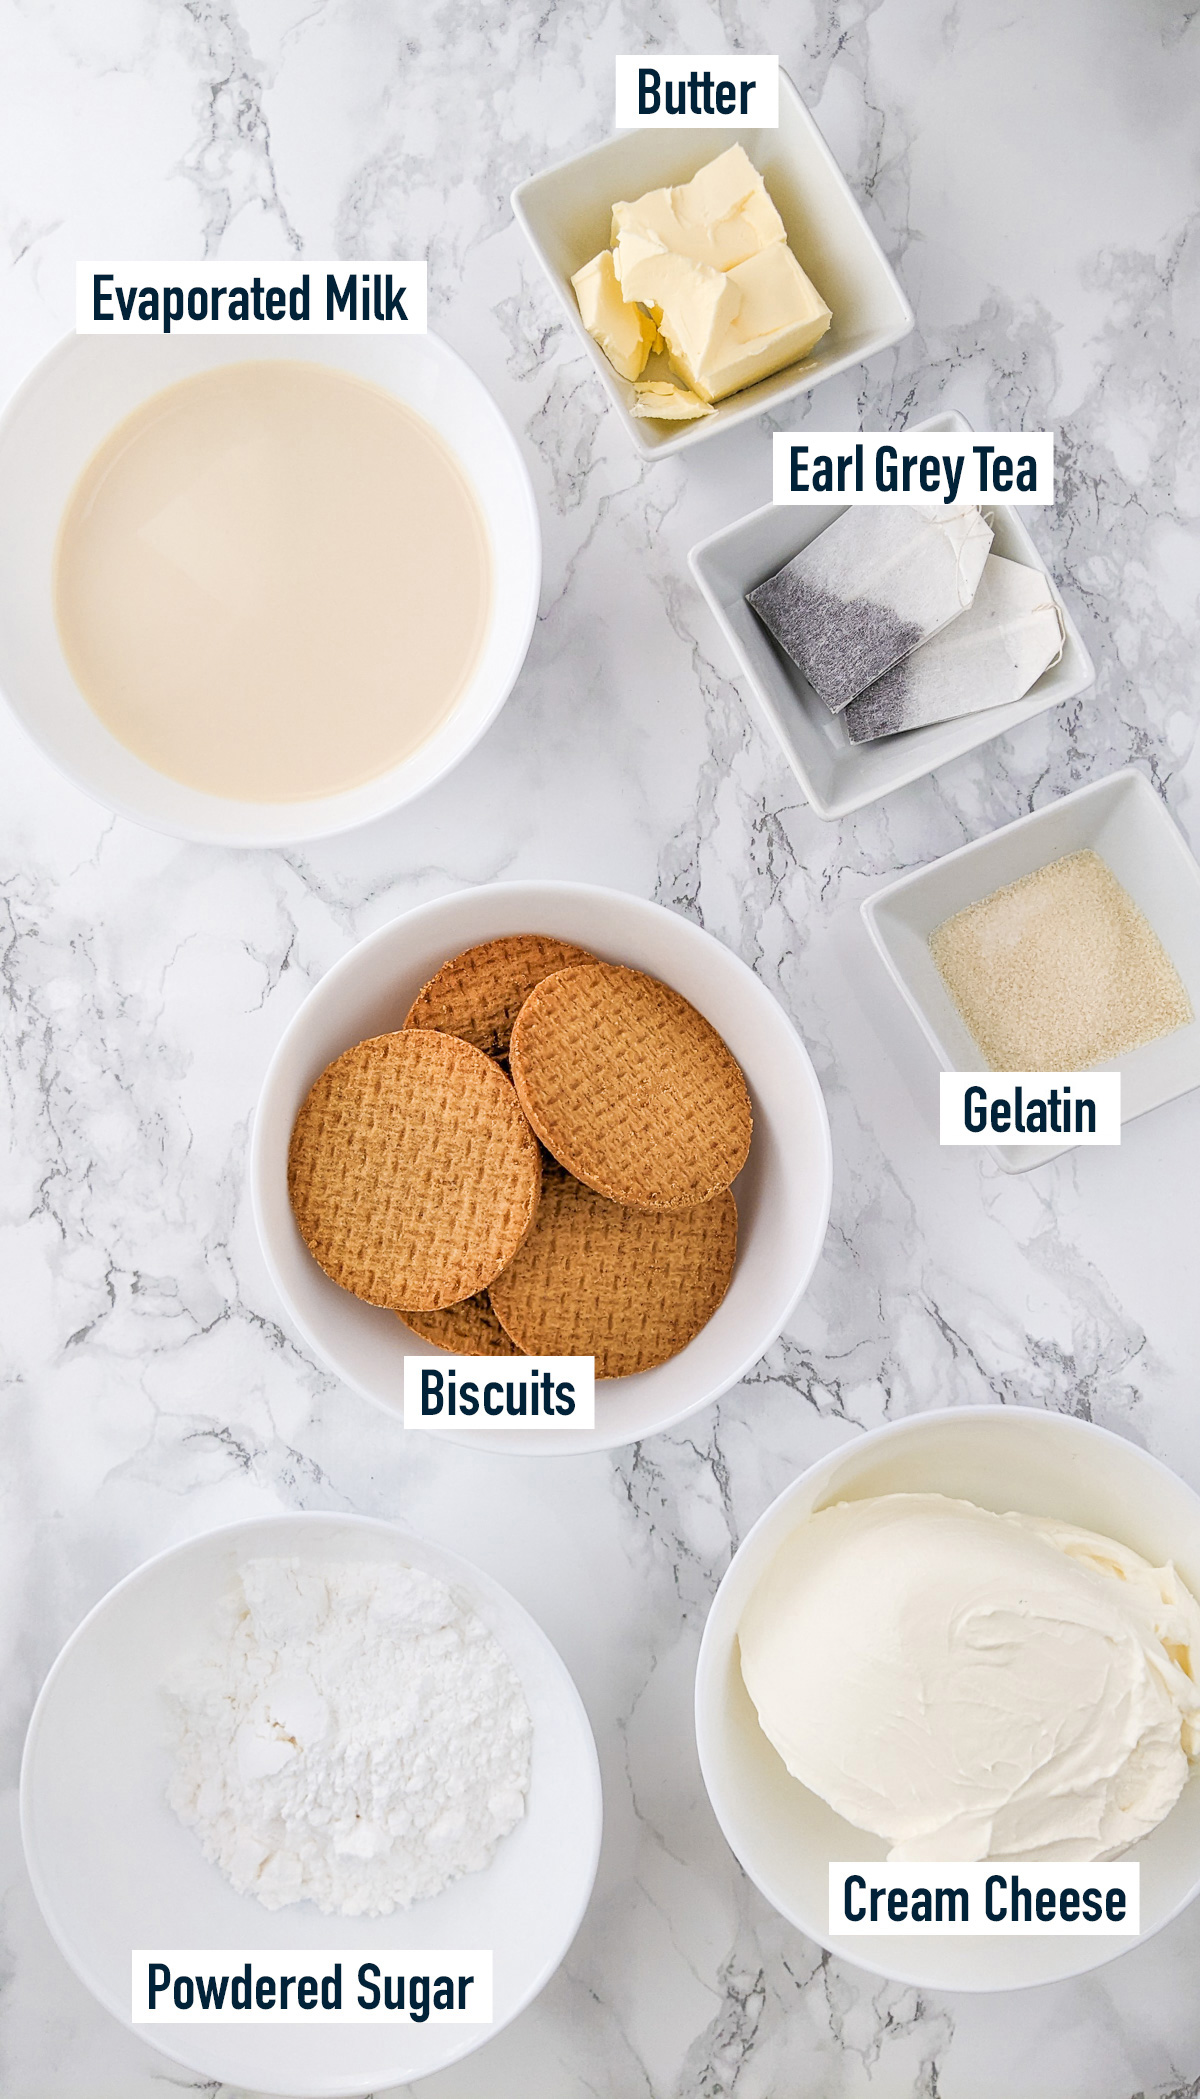
- Gelatin. I used powdered gelatin, but you can easily replace it with leaf gelatine.
- Evaporated Milk. I used evaporated milk to give a richer caramelized flavor. You can replace it with single cream to get a creamy texture or use regular milk instead.
- Earl Grey Tea. Use your favorite earl grey tea that you prefer. Just ensure that it has a strong aroma.
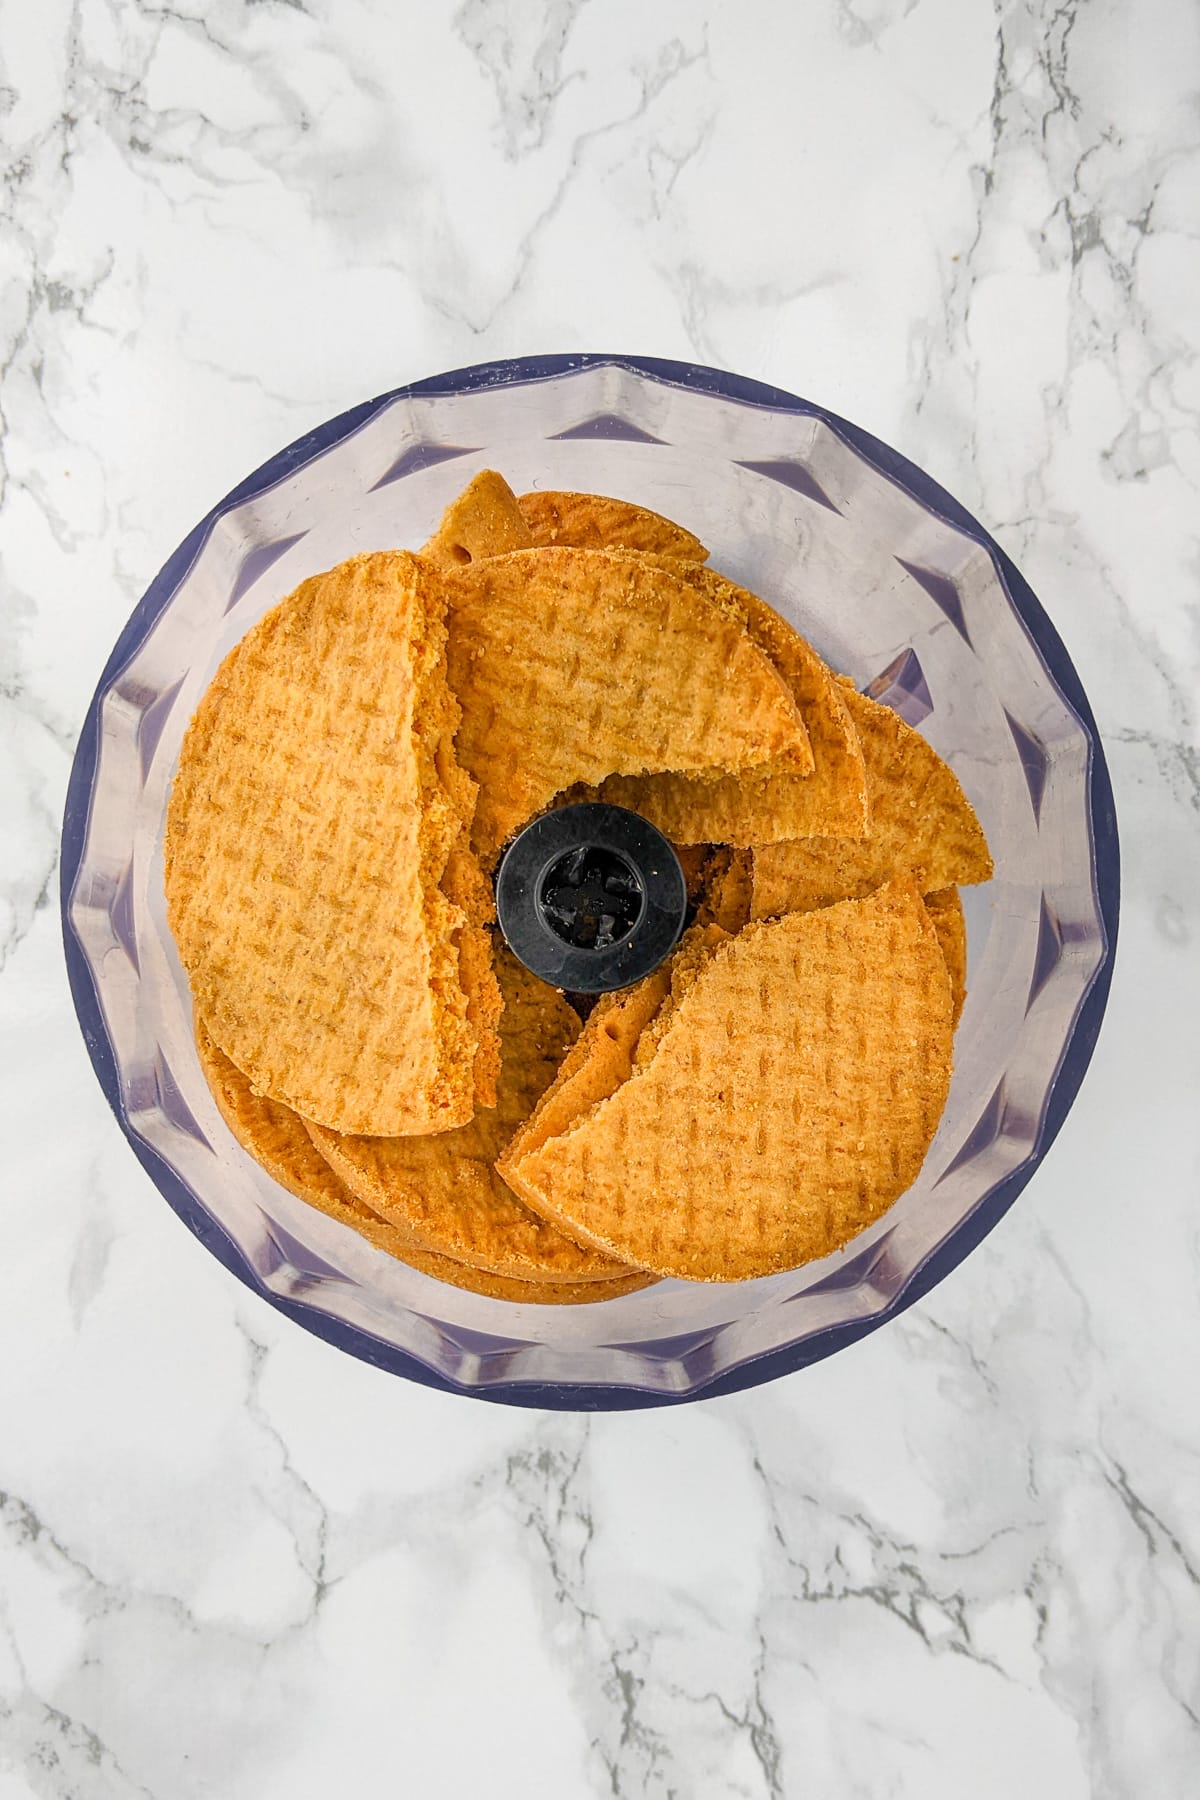
- Biscuits. I used digestive biscuits, but you can use any other type of biscuits that you usually use as a base for the cheesecakes.
- Butter.
- Cream Cheese.
- Powdered Sugar.
👩🍳 Step-by-step Directions
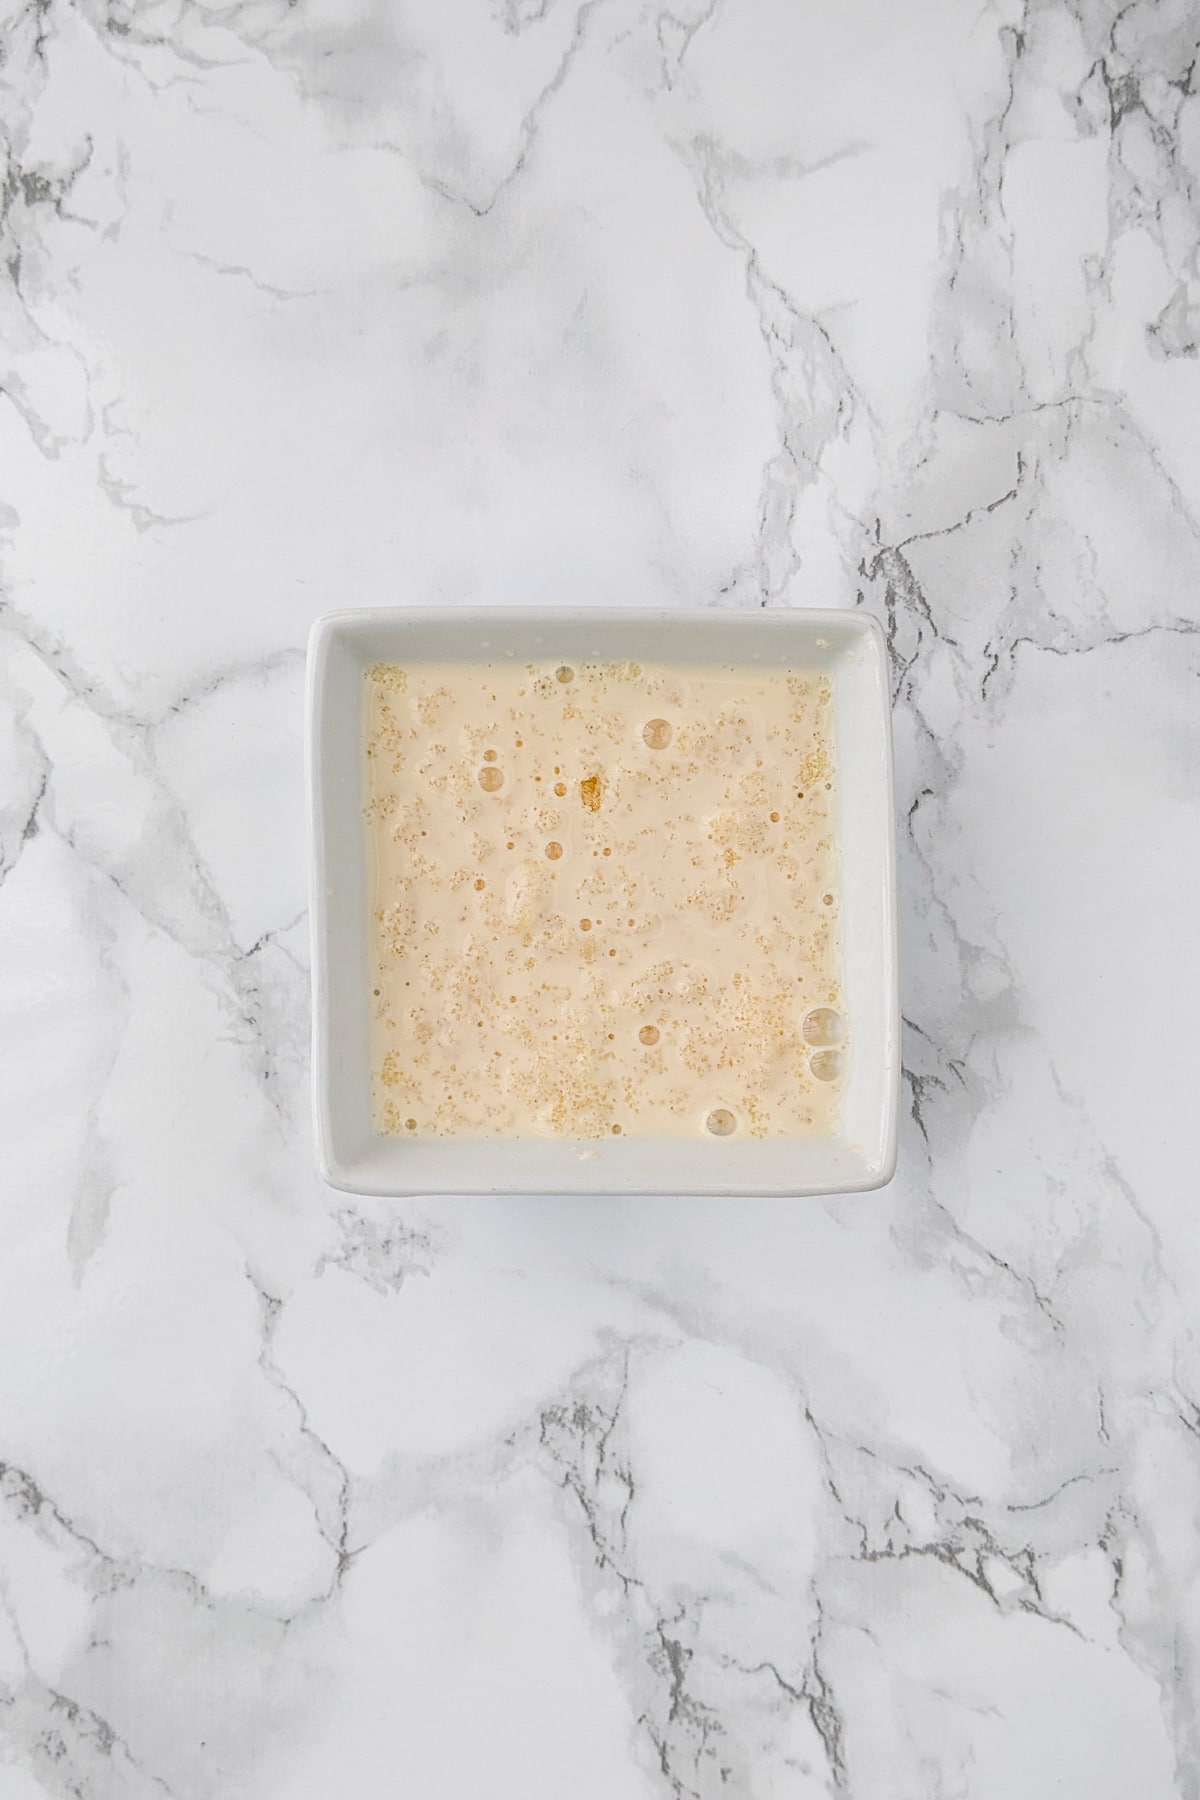
In a plate, pour half of the amount of evaporated milk and soak in it the gelatin.
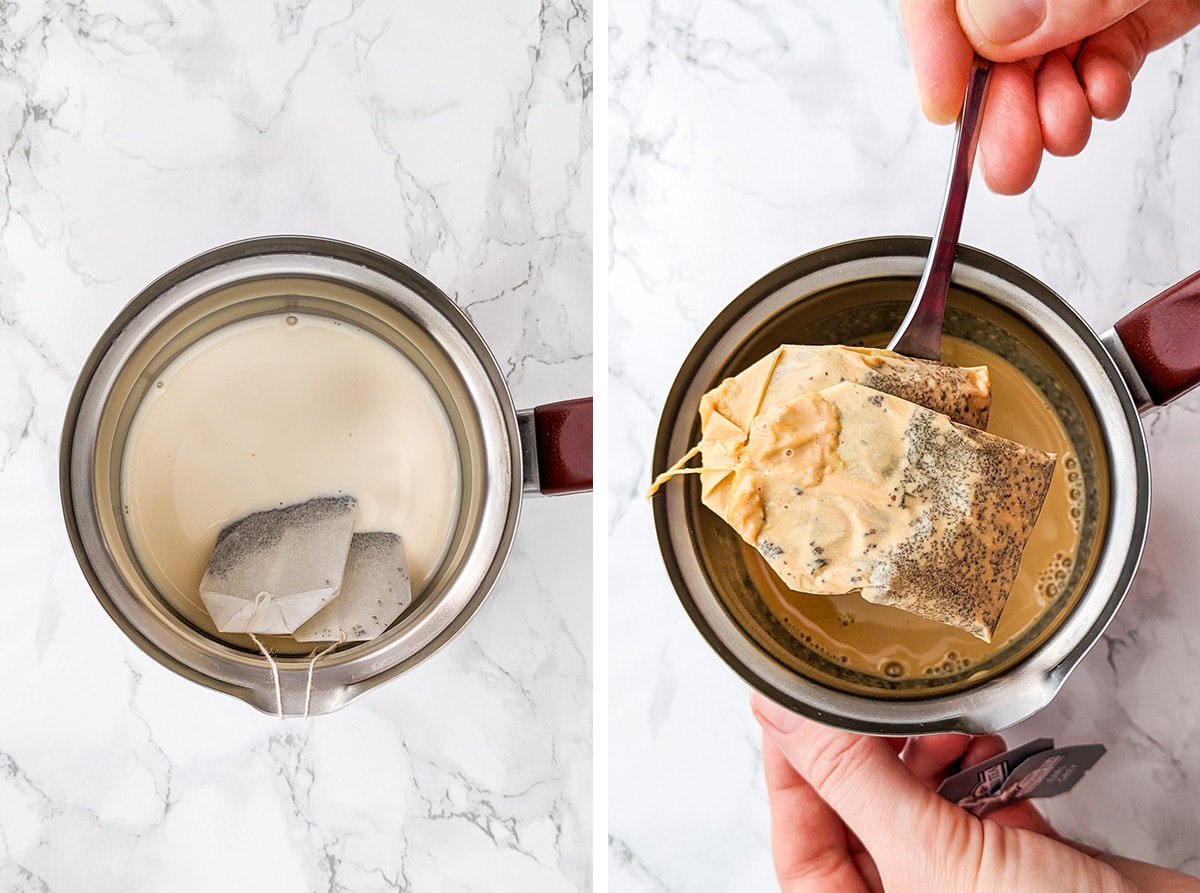
After that, take a small saucepan and infuse the earl grey tea in the rest of the evaporated milk.
To infuse the earl gray tea, heat the evaporated milk, then dip the tea bags in it. Leave it like that until we prepare the rest of the ingredients.
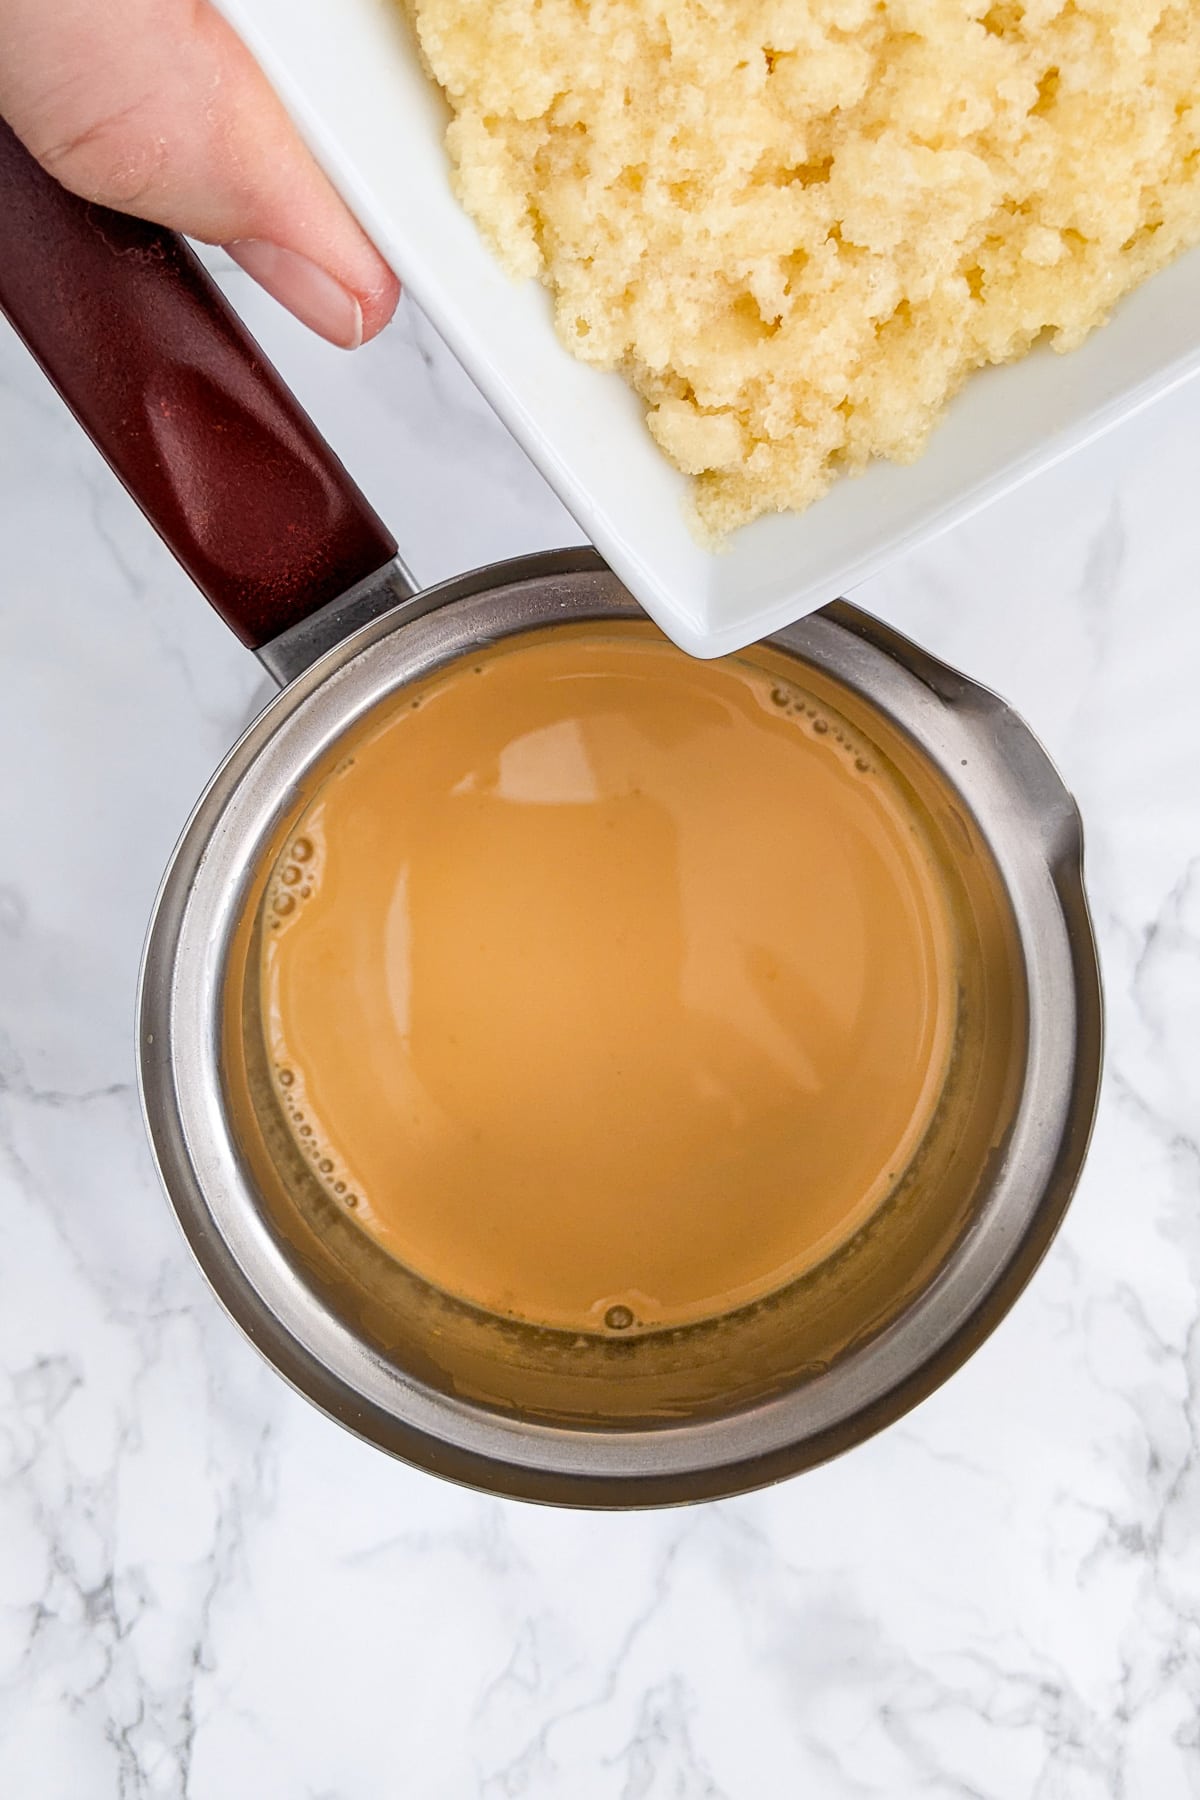
In the meantime, let’s prepare the biscuit base for the cheesecake.
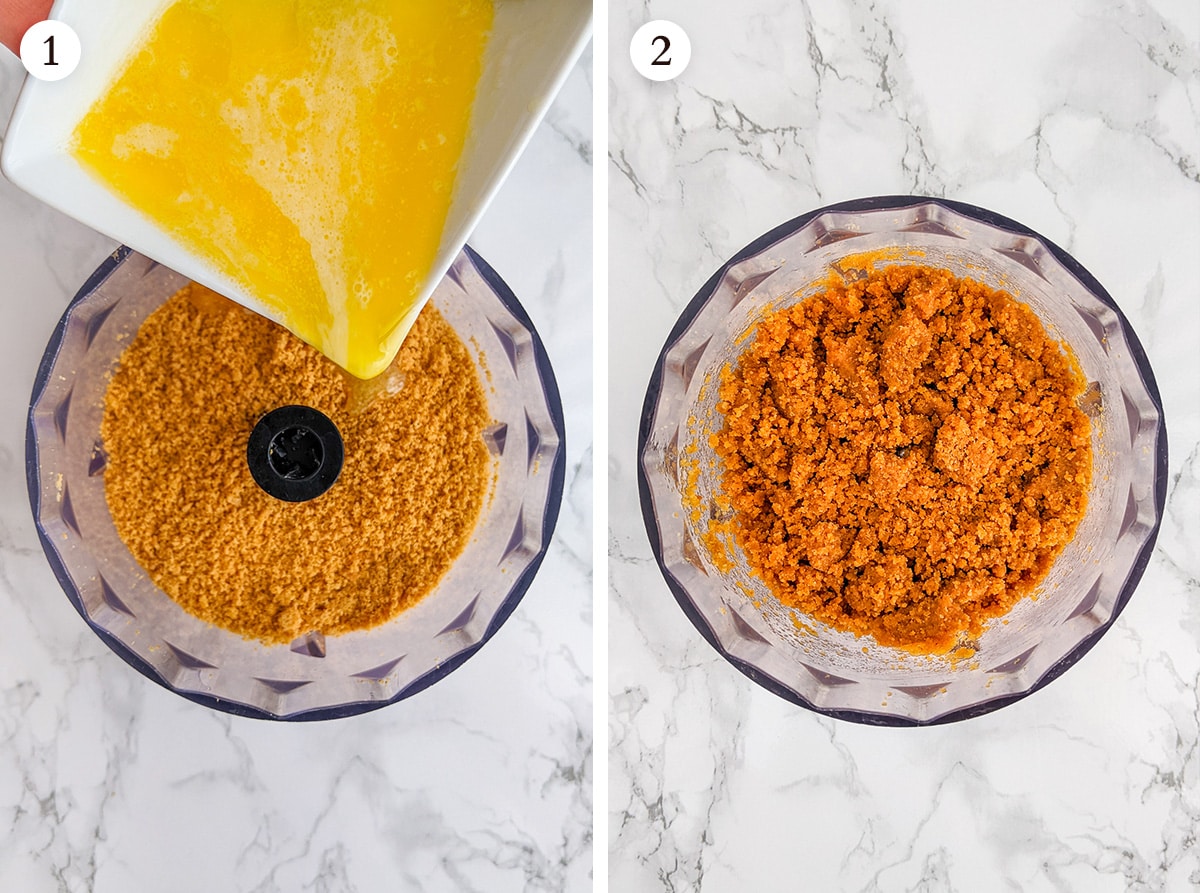
Crush the biscuits. You can use a food processor, or you can put the biscuits into a bag and, using a rolling pin crush the biscuits.
After that, melt the butter in the microwave or in a saucepan and pour it over the biscuits. Mix well.
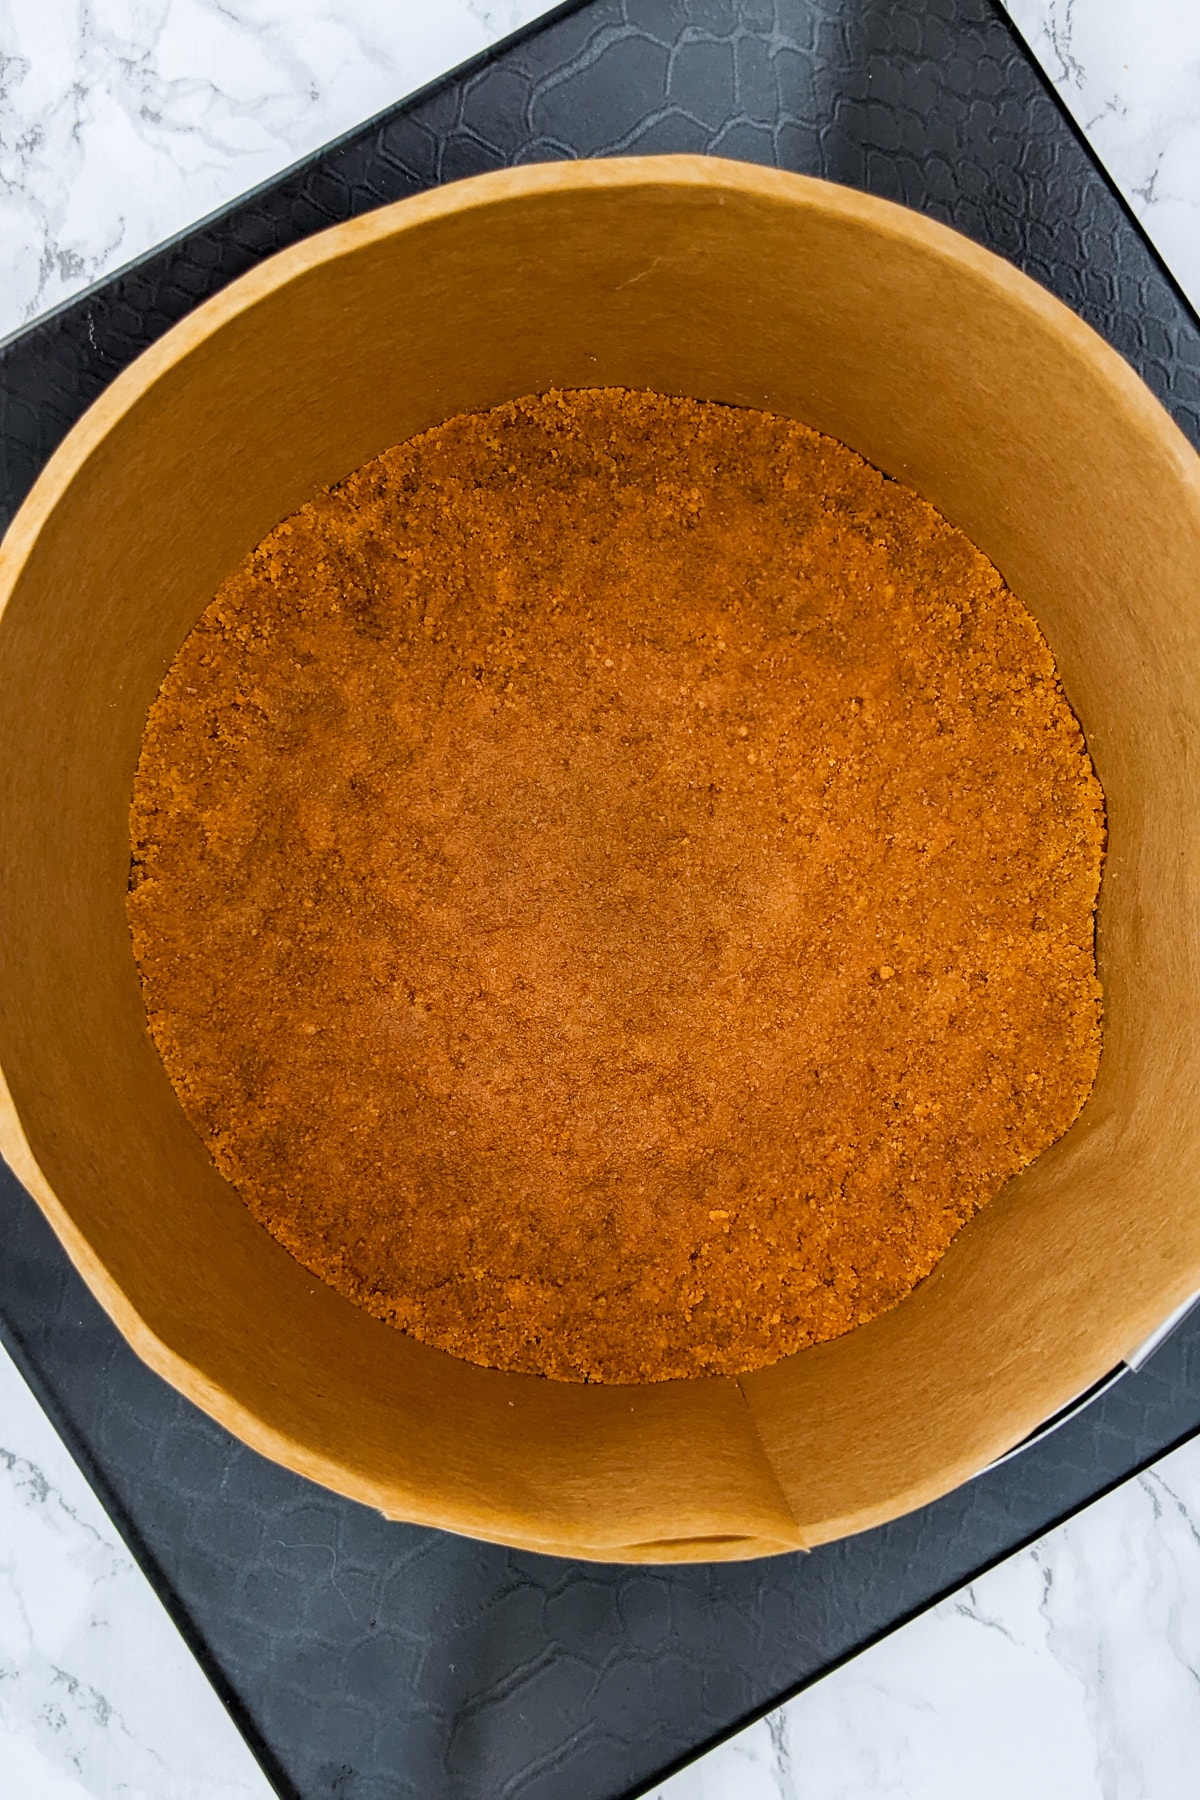
Take a plate on which you plan to serve the cake. Then in it, put the baking ring and cover the walls of the baking ring with baking paper or acetate film.
Now, you can pour the biscuit cheesecake base that we did previously with crushed biscuits and melted butter.
After that, using your fingers or glass with a flat bottom, press the biscuits to get a compact and uniform layer.
Quick Note: Put this plate into the refrigerator to set until we prepare the rest of the ingredients for the cheesecake.
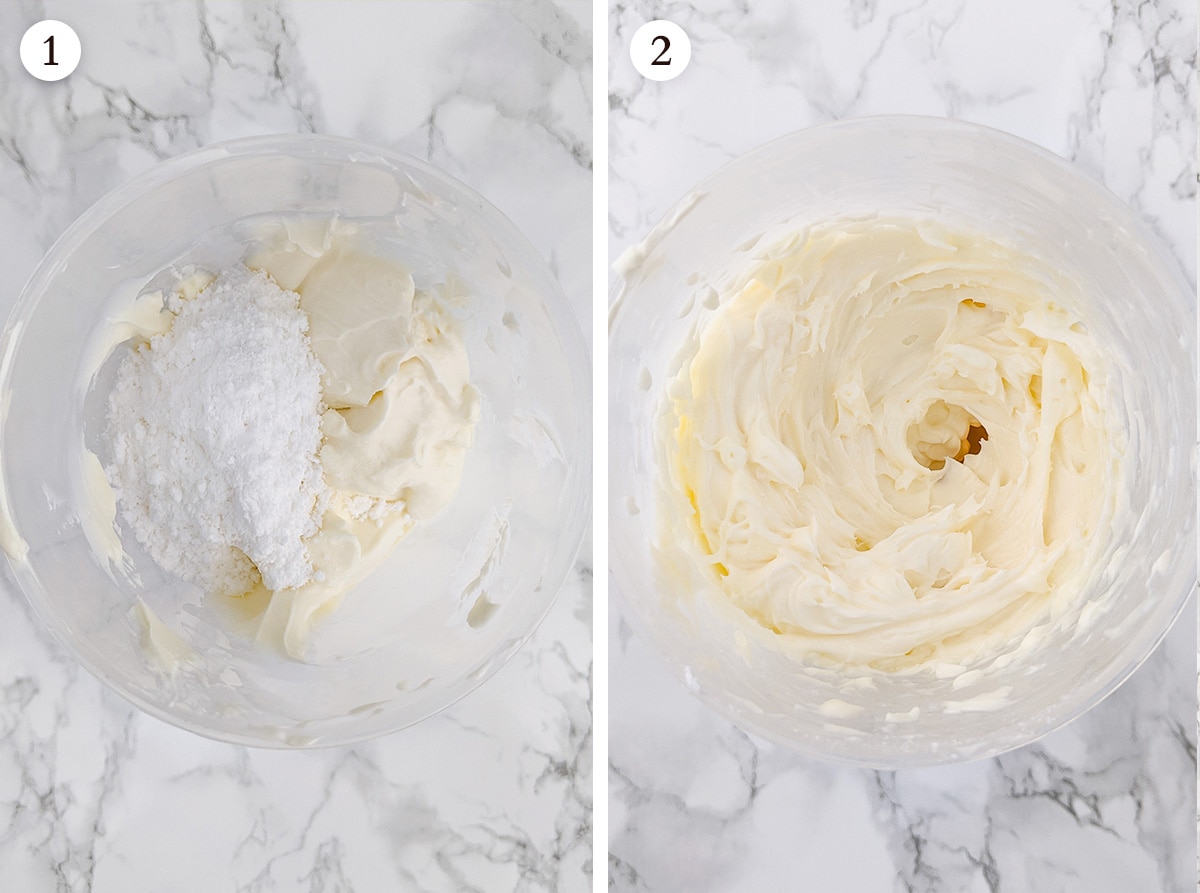
Now, let’s start preparing the cream for the cheesecake.
We will need a mixer to whisk for that.
At this stage, our goal is to incorporate cream cheese with powdered sugar.
Now, let’s return to the infused evaporated milk with the earl grey tea.
Remove the tea bags from the evaporated milk and dissolve the gelatin that has swollen in the meantime in the milk.
Pro Tip: If the tea-infused milk is cold, heat it well, but be careful not to boil the gelatin because it will lose its gelling properties.
The next step is to incorporate the gelatin into the cream cheese mass. To avoid lumps and uneven gelling, add only half of the cream cheese mass to the milk with the dissolved gelatin. Stir well.
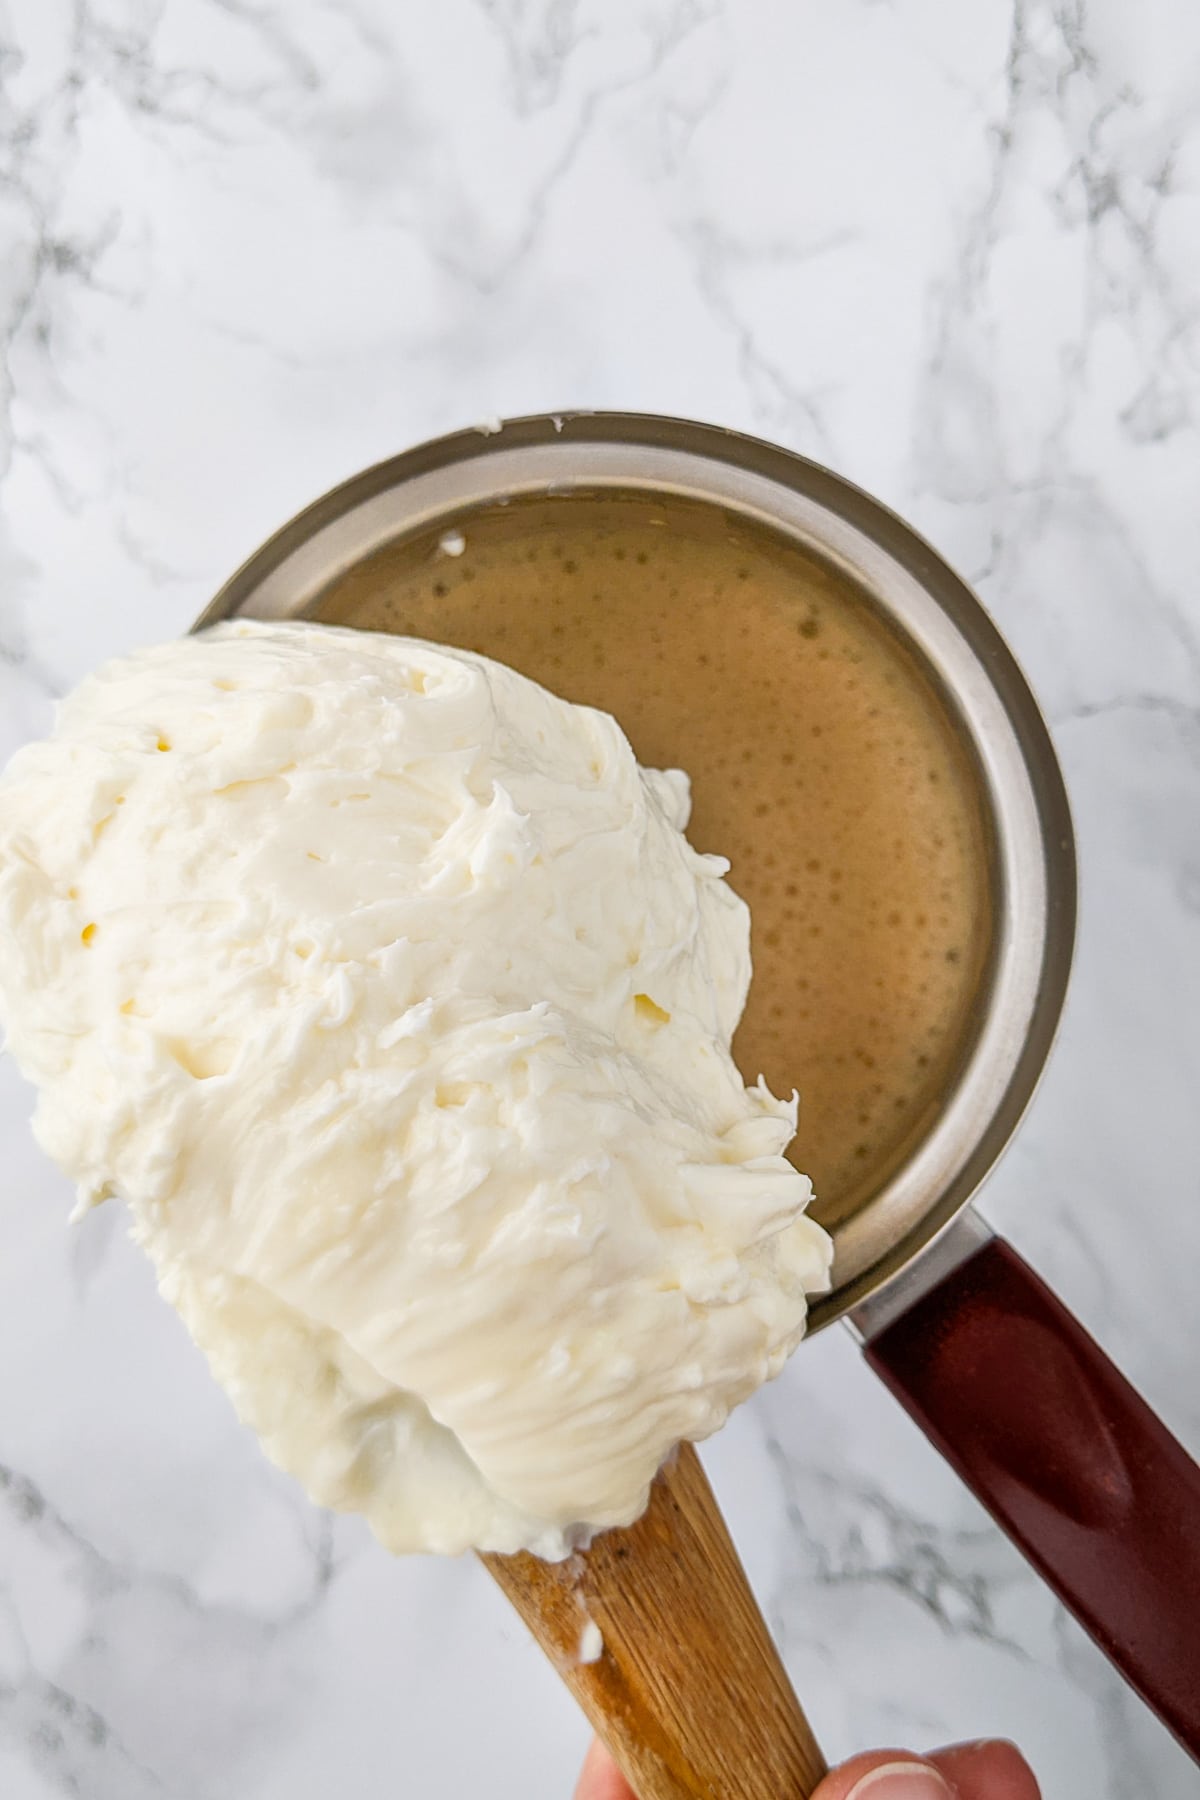
After you mix the composition well, add the rest of the cream cheese composition and mix well again.
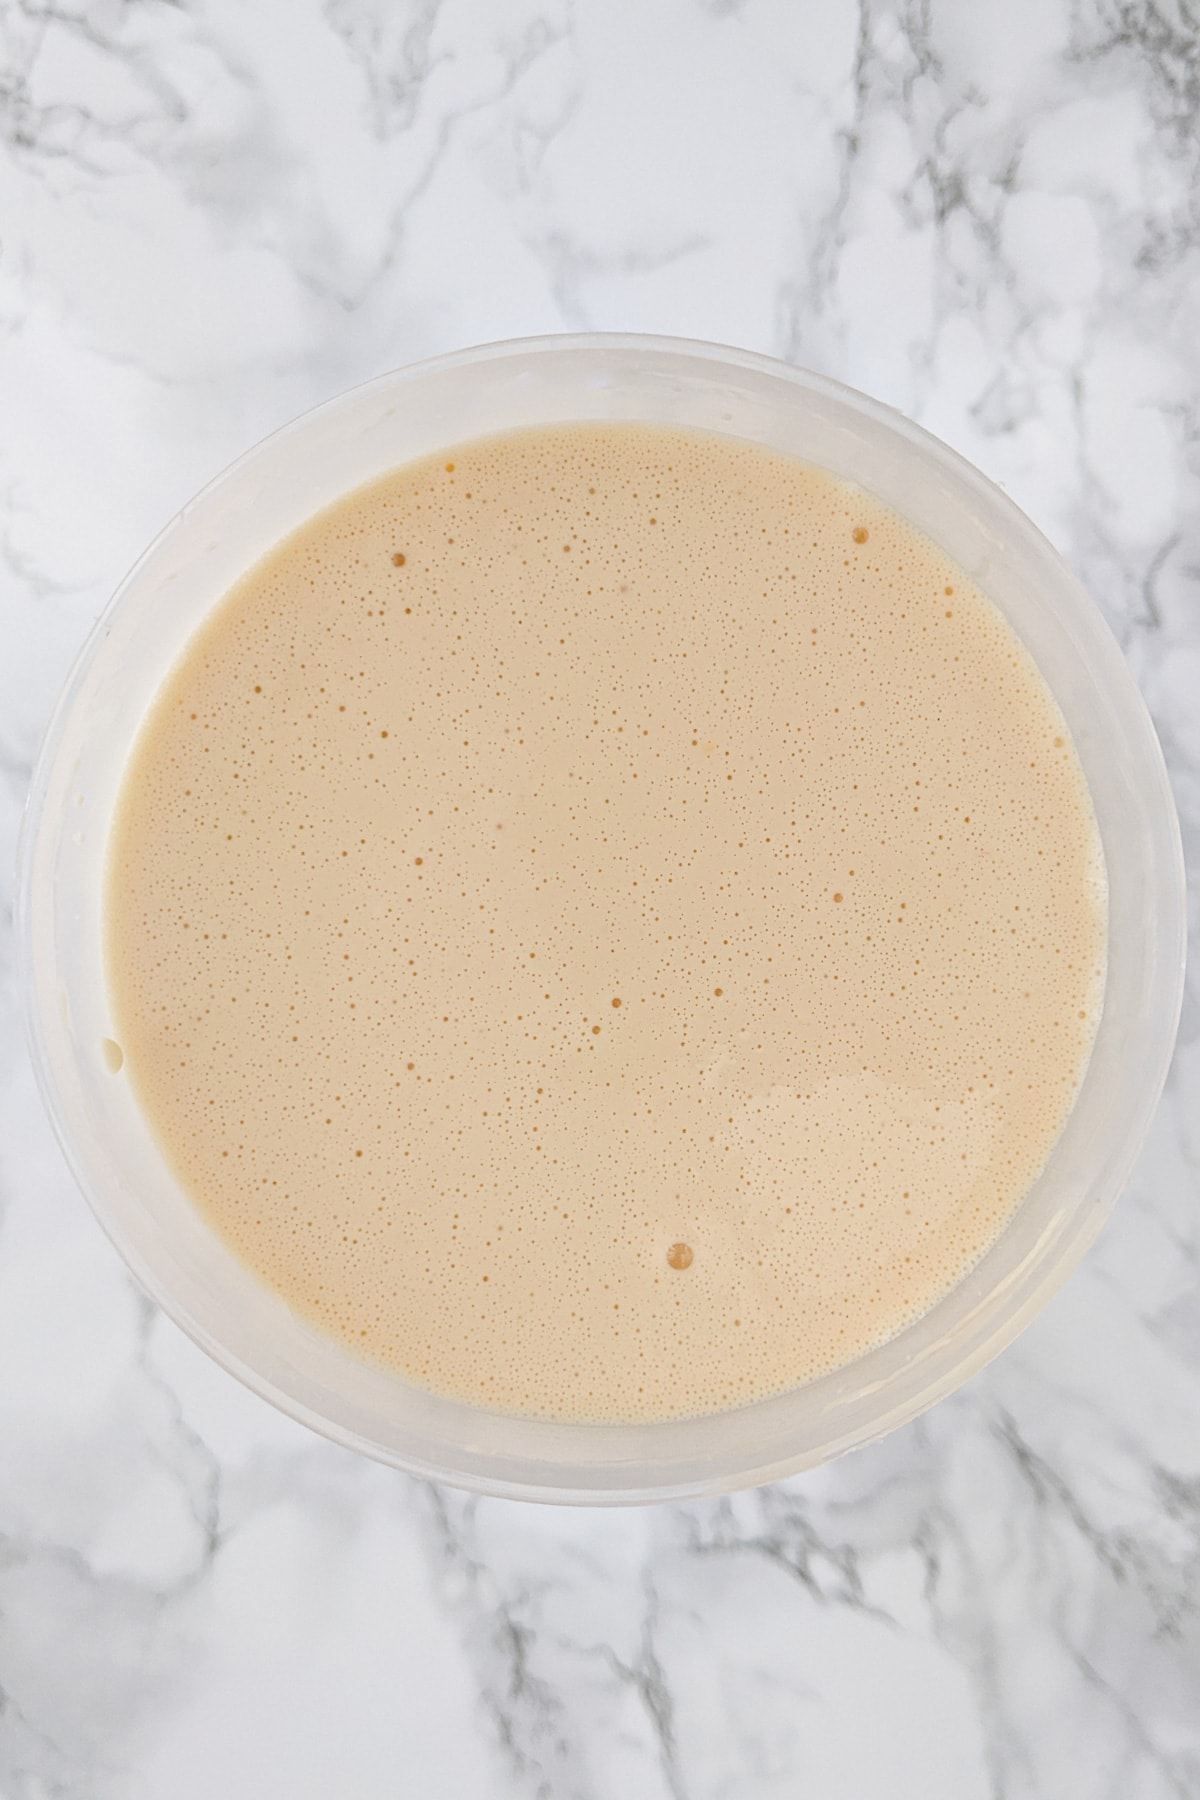
Pour the obtained cream over the biscuit base that we made previously.
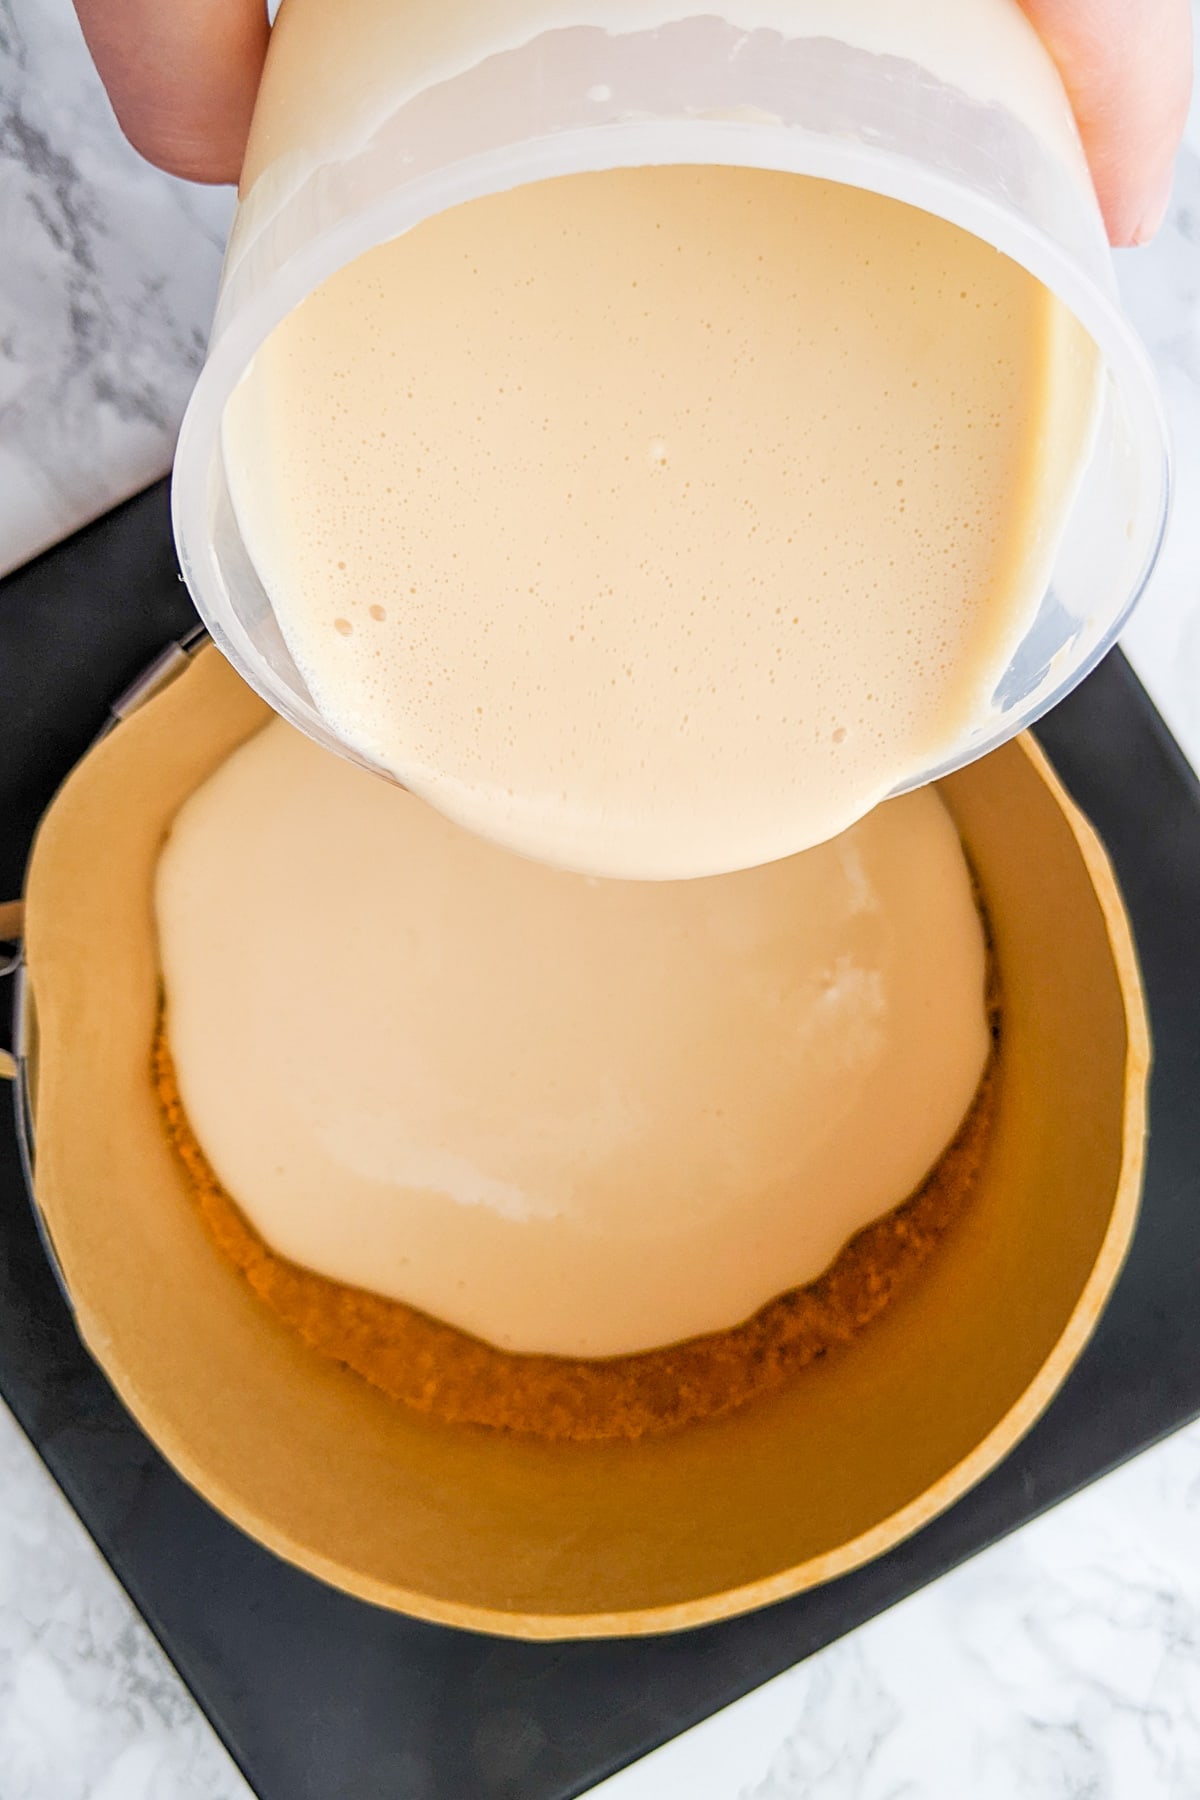
Pro Tip: Put the cake in the refrigerator for at least 4 more hours to ensure that it gels (hardens).
Remove the baking ring from around the cake and carefully remove the baking paper.
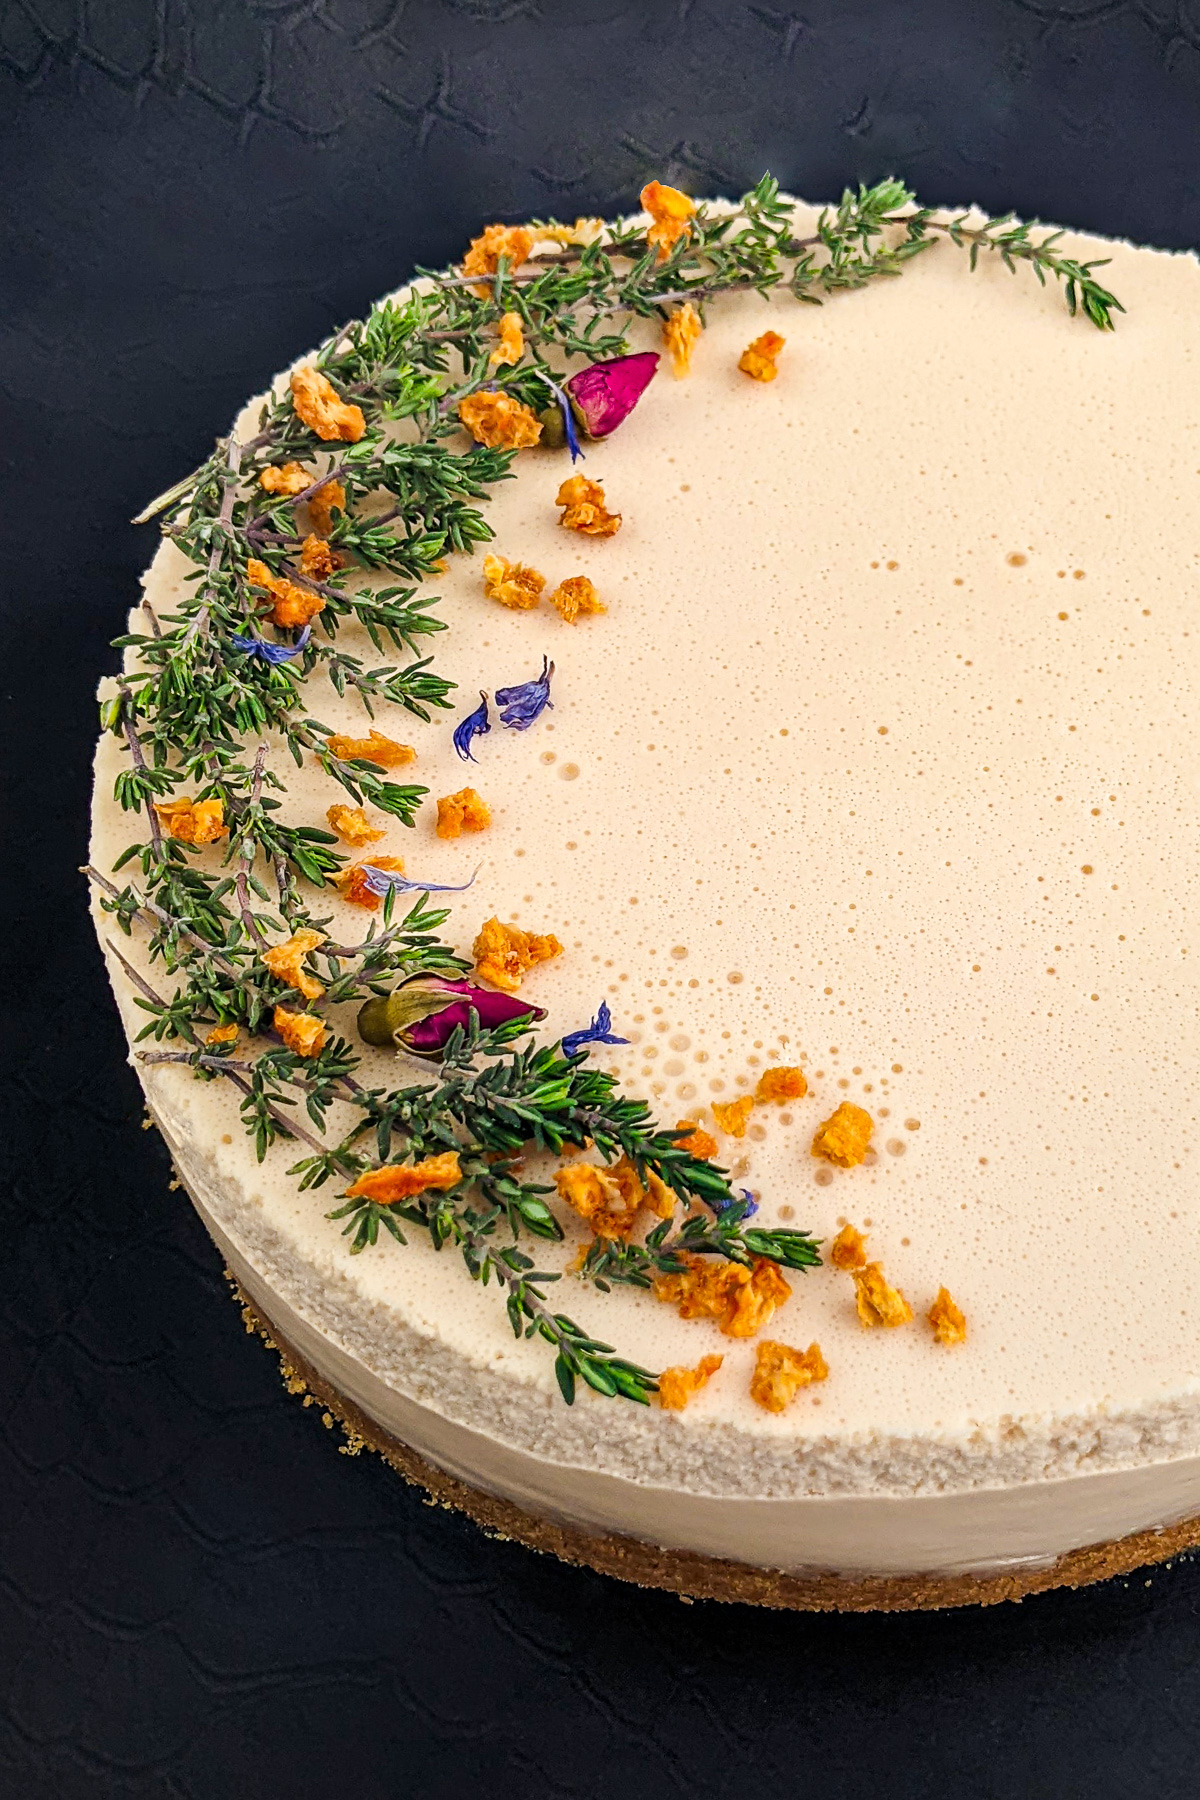
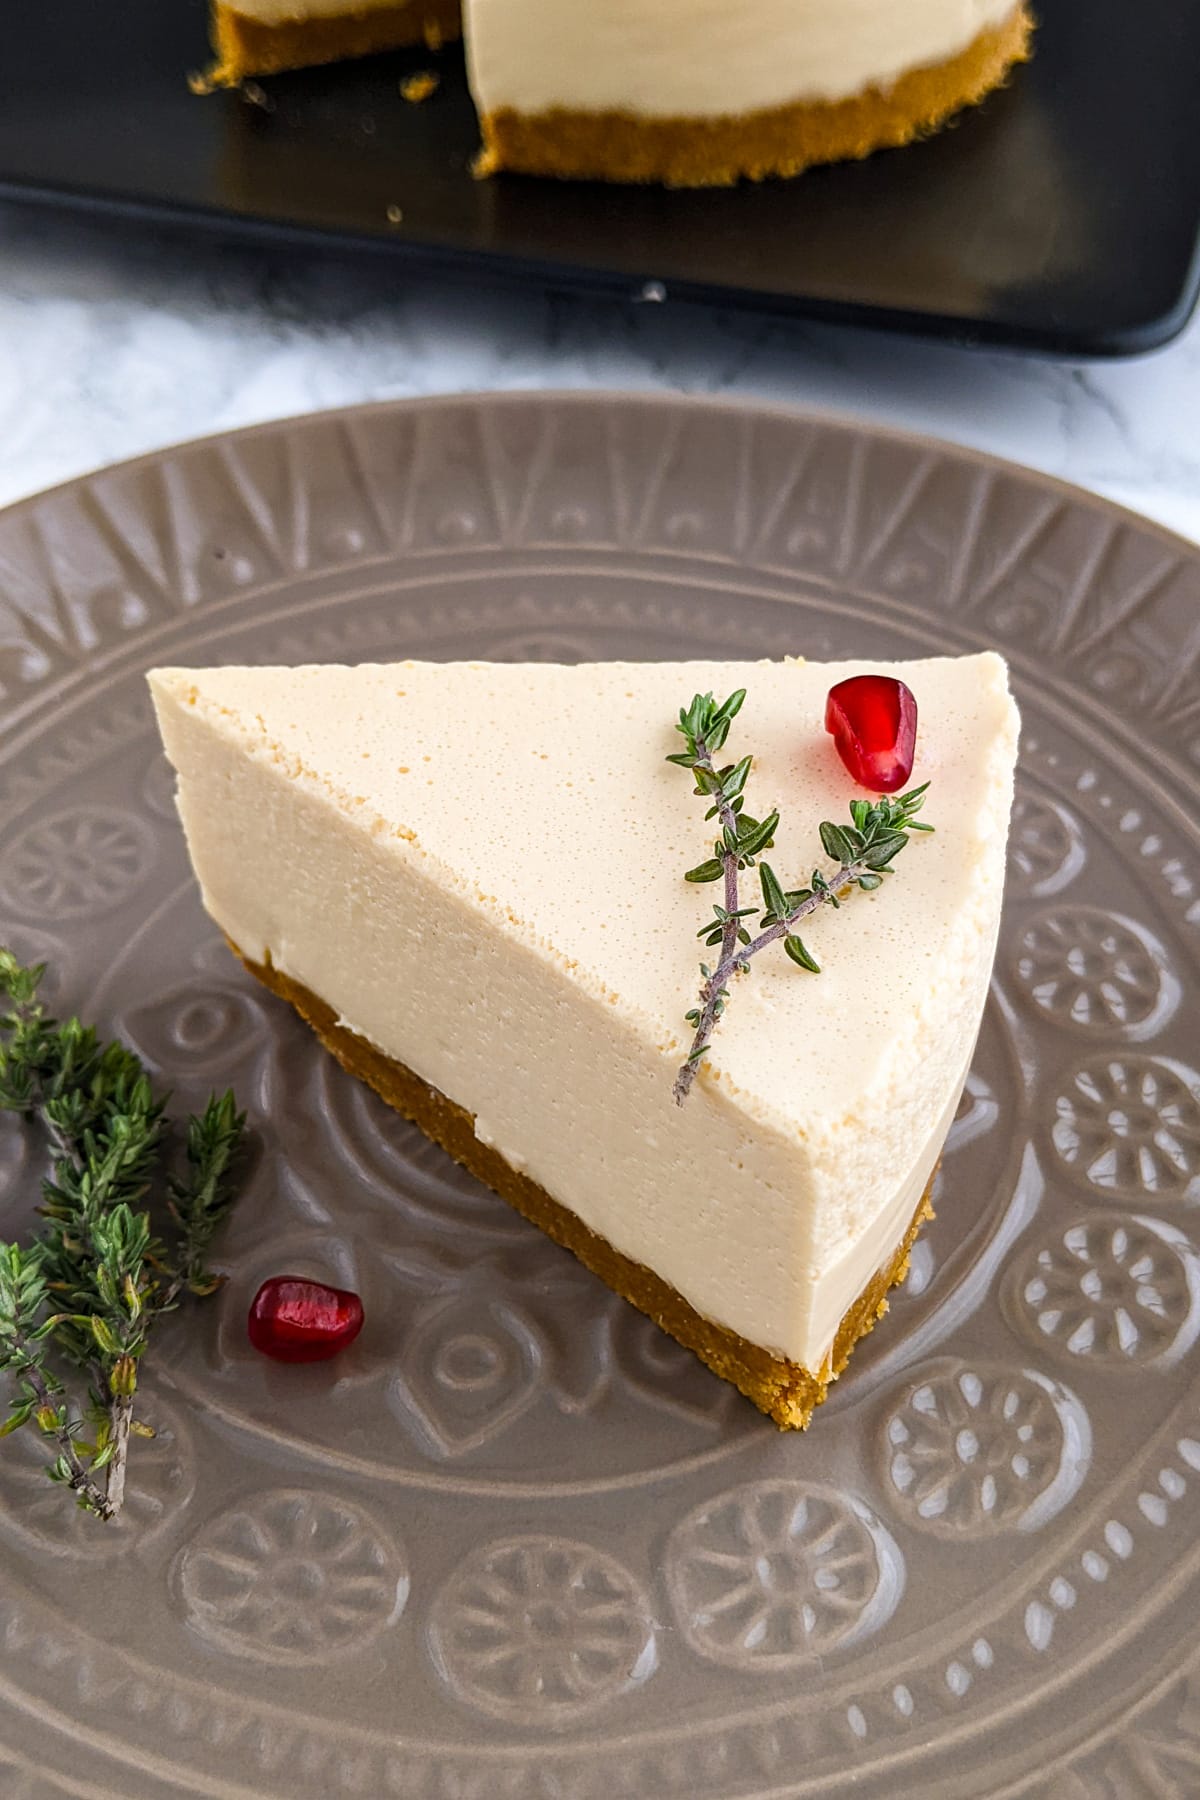
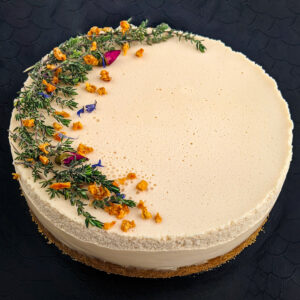
We’re done! Now you can decorate the cake to your liking.
To keep the theme of herbs and tea flavors, I decorated the cheesecake with some aromatic herbs and dehydrated fruits.
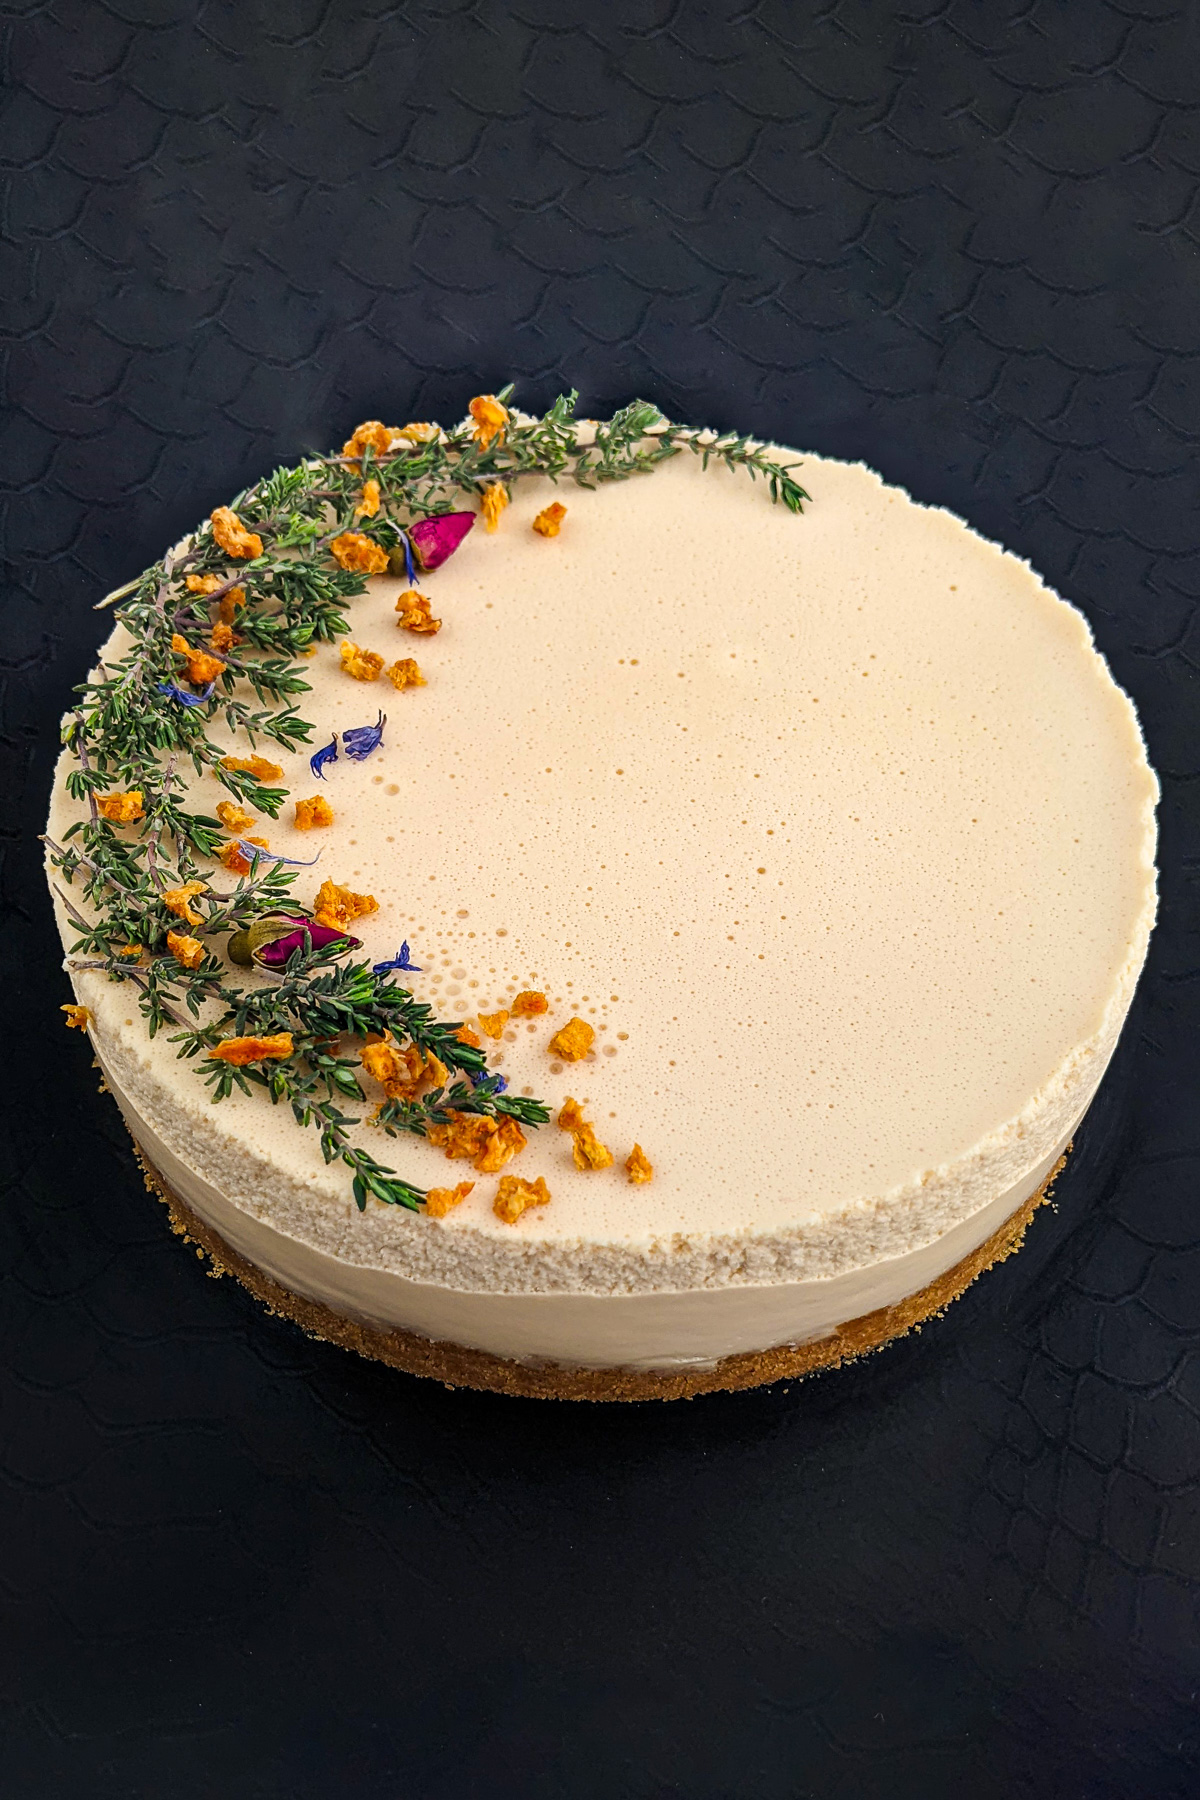
The cheesecake is ready to be sliced and served.
🏆 Expert Tips. What to Pay Attention To?
- To achieve the best flavor and texture, use high-quality ingredients. This includes using fresh cream cheese, good-quality Earl Grey tea, and high-quality gelatin.
- Make sure to dissolve the gelatin properly to avoid lumps in the filling. Follow the instructions on the package carefully and whisk the gelatin into the filling mixture until it’s fully dissolved.
- After making the cheesecake, it’s important to leave it to chill to ensure it sets properly.
- Use a baking ring because it is ideal for making cheesecakes as it allows for easy removal of the cheesecake without damaging it.
Answering Your Questions:
Can I use a different type of tea for this recipe?
Yes, you can substitute Earl Grey tea with other types of tea, such as chai, jasmine, or green tea, to create a different flavor profile. Just ensure that the tea you choose pairs well with the other ingredients, especially the cream cheese.
Can I make this cheesecake vegan?
To make a vegan version of this cheesecake, replace the butter with a plant-based alternative, such as coconut oil or vegan butter. Use a vegan-friendly biscuit for the crust, and substitute the evaporated milk with a plant-based milk like almond, soy, or oat milk. Use a vegan cream cheese alternative and replace the gelatin with agar-agar, which is a plant-based gelling agent. However, the texture and flavor will be different.
How long should I chill the cheesecake for it to set properly?
Chill the cheesecake in the refrigerator for at least 4-6 hours, or preferably overnight, to ensure it sets properly. The gelatin needs time to firm up and create a stable texture for the cheesecake.
Can I use a different type of sweetener instead of powdered sugar?
Yes, you can replace powdered sugar with other sweeteners such as granulated sugar, honey, maple syrup, or a sugar substitute like Stevia. However, the texture and sweetness level may vary depending on the sweetener used, so adjust the amount accordingly and consider how it may affect the overall texture of the cheesecake.
Can I add other flavors or toppings to the cheesecake?
You can certainly customize the cheesecake by adding other flavors or toppings. Consider folding in some lemon or orange zest into the filling, or adding a layer of fruit compote or jam on top of the cheesecake. You can also garnish the cheesecake with fresh fruit, whipped cream, or a dusting of cocoa powder.
📋 Recipe Card:
Earl Grey Cheesecake (No-Bake)
Equipment
Ingredients
- 3 teaspoons Gelatine Powdered
- ½ cup Evaporated Milk
- ½ cup Evaporated Milk
- 1 tablespoon Earl Grey Tea or 2 tea bags
- 4.5 oz Biscuits Plain Sweet
- 1 ¾ oz Butter
- 1 ⅔ cup Cream Cheese
- 4 tablespoons Powdered Sugar
Instructions
- Soak the gelatin into half (½ cup) of the amount of evaporated milk.3 teaspoons Gelatine, ½ cup Evaporated Milk
- Take a saucepan, pour the rest of the evaporated milk, heat it up and infuse the earl grey tea in it.1 tablespoon Earl Grey Tea, ½ cup Evaporated Milk
- In the meantime, prepare the biscuits base. Crush them using a rolling pin or a food processor.4.5 oz Biscuits
- Melt the butter in a microwave or in a saucepan and pour it over the biscuits. Mix well.1 ¾ oz Butter
- Take a plate on which you plan to serve the cheesecake and arrange on it the baking ring. Cover the walls with baking paper.
- Pour the crushed biscuits into it. Now, with your fingers or with a glass with a flat bottom, press the biscuits to get a compact and uniform layer. Move the biscuit base into a refrigerator for at least 4 hours.
- Return back to the cream. Combine the cream cheese with powdered sugar using a whisk.1 ⅔ cup Cream Cheese, 4 tablespoons Powdered Sugar
- Now, remove the tea bags from the evaporated milk. Combine this composition with the gelatin mix.
- Incorporate the gelatin mass with the cream cheese mixture. To avoid lumps, this step into two stages. Add half of the cream cheese, incorporate it well, then add the rest of the cream cheese.
- Pour the obtained composition above the biscuits base.
- Return the cheesecake back to the refrigerator so the gelatin will harden.
- After that time, remove the baking ring, baking pepper and decorate the earl grey cheesecake as you wish. To keep the same theme of tea, I decorated it with aromatic herbs and dried fruits.
Quick Note
I highly recommend reading the entire recipe to find more tips and notes about this recipe. Read Full Recipe ⇑
Leave a Reply